• Hello there guest and welcome to our forum!
    To gain full access you must Register. Registration is free and it takes only a few moments to complete.
    Already a member? Login here then!

Project Orange395w Cam swap

orange395w

OG MEMBER
Staff member
Bobby, not being a smartass as this is an actual question.....

How are yo going to dial in the valvetrain? I have read about it and stuff, but have never had to mess with it so I dont know how to. Just wondering what way you do it. Thanks.


Gib

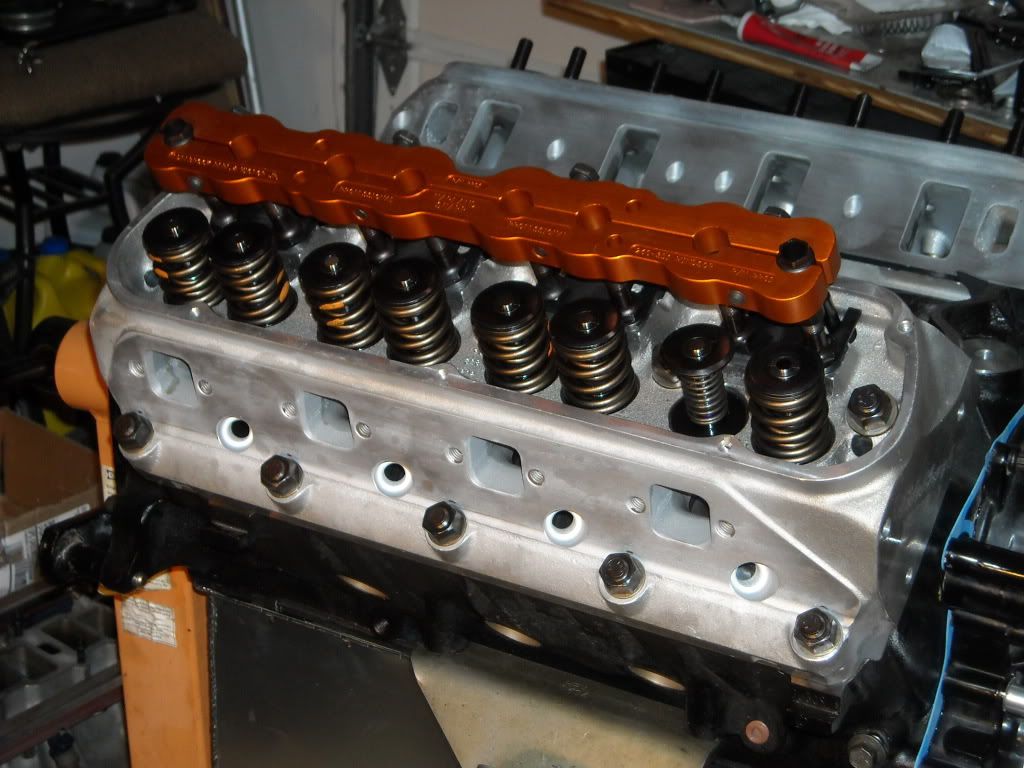
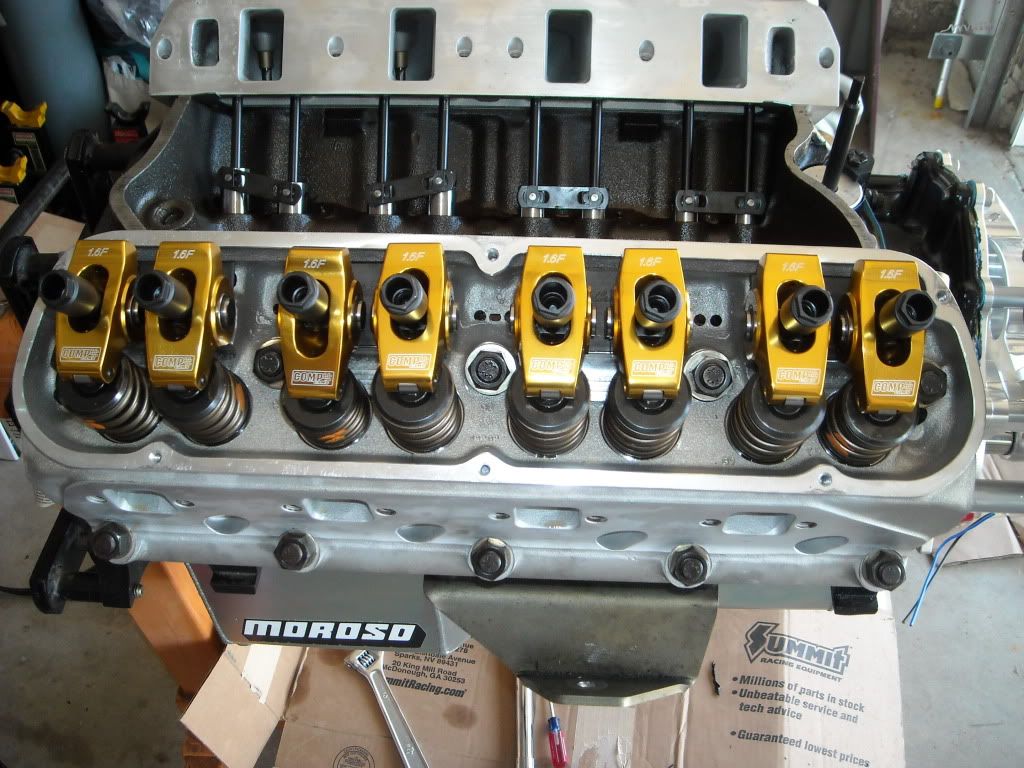
Well pushrod length is the hard part, but I'm not sure if that's what you are asking? I think that you are talking about the roller rockers.

Well hydraulic rollers will be set up a little different than a mechanical roller (solid), but this is the way to do it.

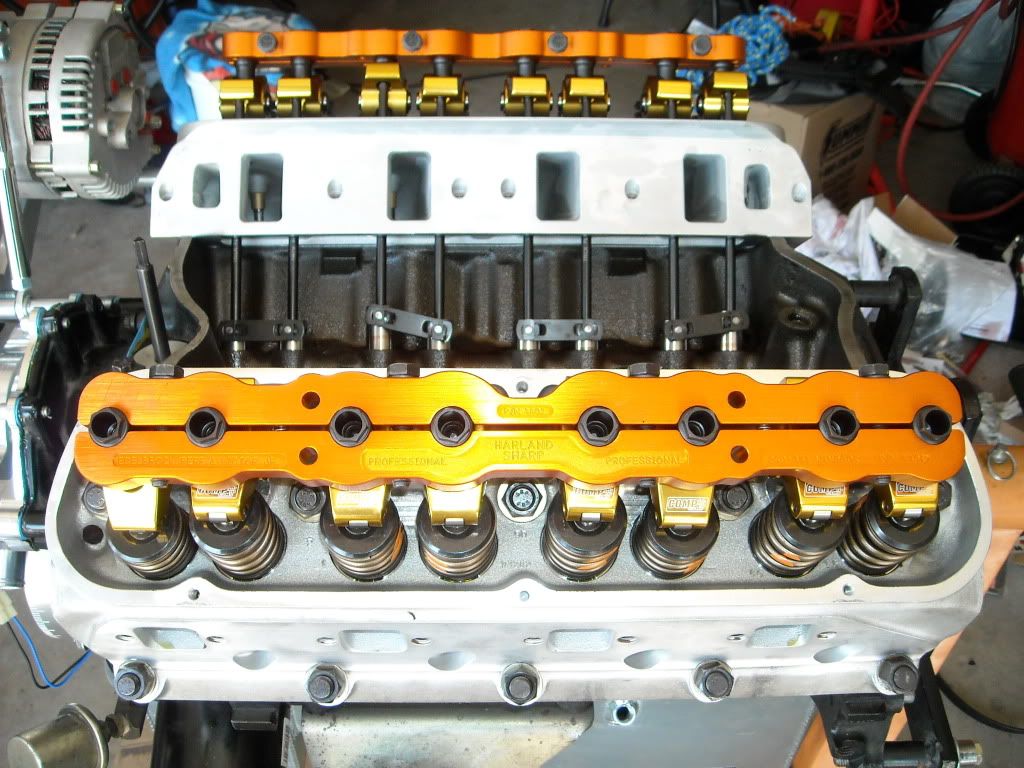
First you have to know what your valve lash should be (this only applies to solid) in my case it's Hot lash .020". Since the engine will be started cold you actually subtract .006" from that number for initial set up for aluminum heads and -.004" for iron heads.

Mine are aluminum so I will start at .014". You will need a feeler gauge of course.

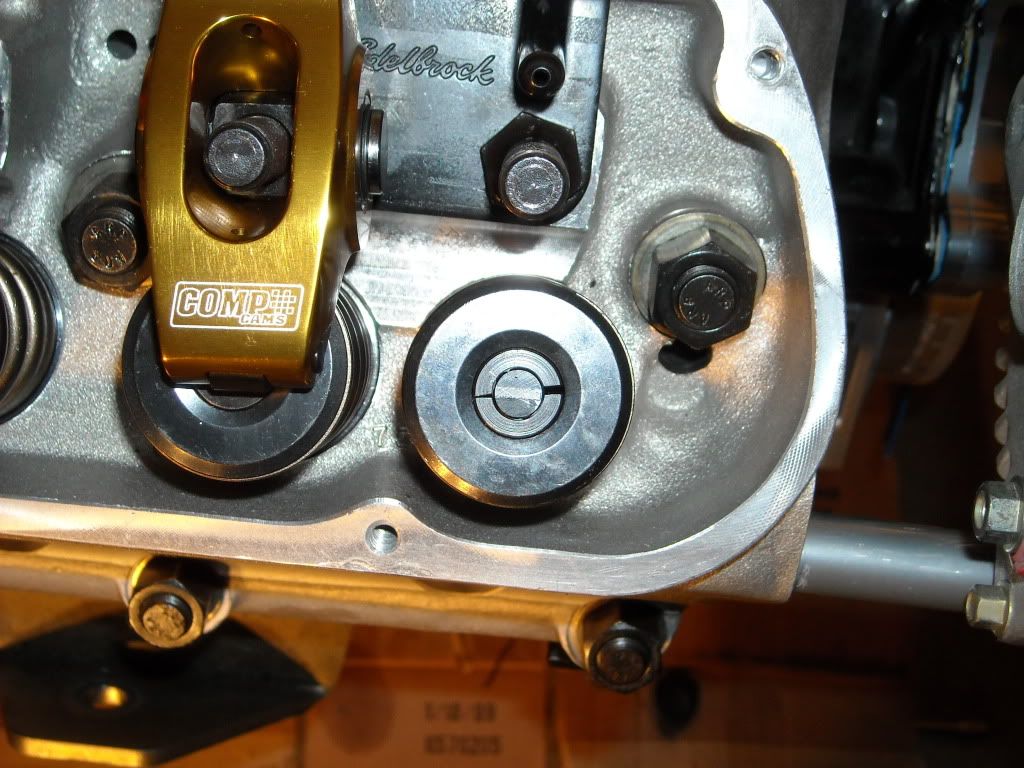
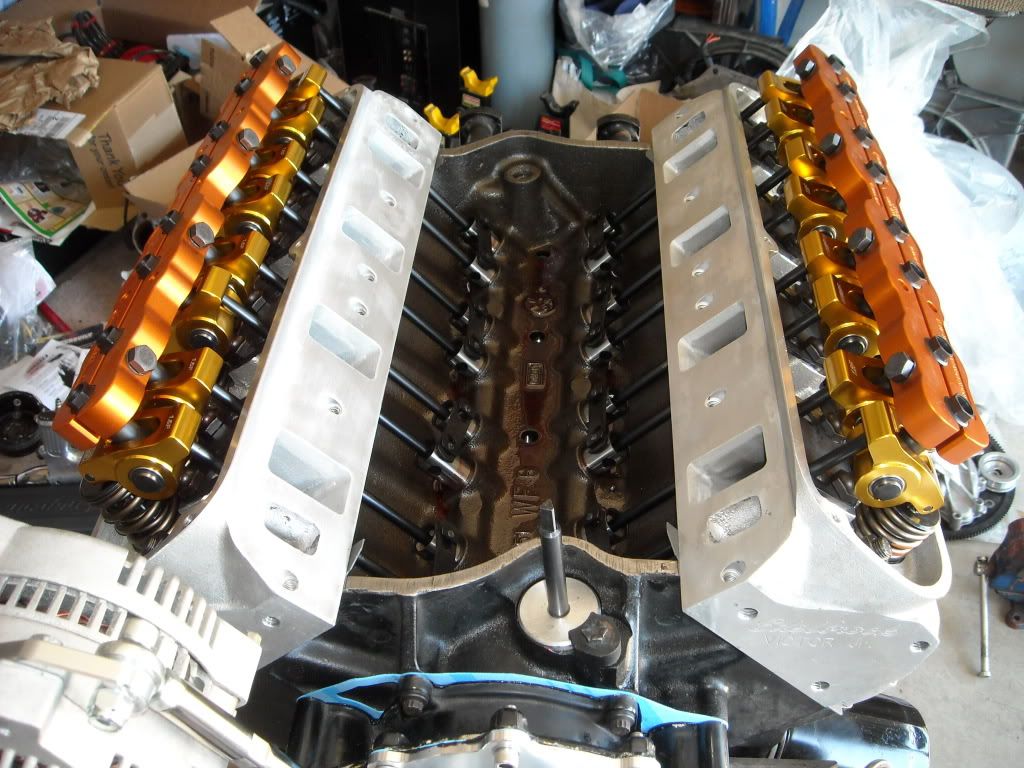
Well start with the number one cylinder. Manually rotate the crankshaft and watch the exhaust valve/lifter on the number 1 cylinder. As soon as it starts to open, STOP! The intake lifter is now and the base circle of the cam and ready to be adjusted. Now with the feeler gauge in place start turning down the rocker adjusting nut until you feel a slight drag and then lock down the polylock.

Now move on to the exhaust side. Rotate the crank in its normal rotation (clockwise) watching the same intake valve that you just finished adjusting. It will go to full open and then begin to close. When it is almost closed, STOP! You are now ready to adjust the exhaust valve.

Repeat this for the rest of the cylinders.

For a hydraulic set up you would tighten the adjusting nut until you hit zero lash and turn the adjusting nut 1/2 turn more and lock it down.

I'm happy to answer any questions that you might have. If anything doesn't make sense let me know.
 

orange395w

OG MEMBER
Staff member
Well here is the actual pictures of the parts rather than a representation. Just in case anyone was curious as to how a stud girdle works I included a picture of two studs. The small stud is what comes with your roller rockers and no girdle being used. The long one is obviously for the stud girdle. Once your rockers are all in place. Slide the girdle over the top of all 8 studs and tighten it down. Just like magic no more stud flexion!! which = stable valvetrain and proper cam timing events.

DSCN0001.jpg


DSCN0002.jpg


Oh yeah, the pushrods came in as well. I will do one final check to assure that I have the proper length and then proceed to set up the valves.

DSCN0003.jpg
 

orange395w

OG MEMBER
Staff member
Well made a little bit of progress tonight. I had to clearance some of the oil pan holes to get it to sit down all the way. Overall I'm very happy with this pan. I can already tell the seal will be better than that of the Canton pan. Well here are just a couple of pics.

DSCN0004.jpg


DSCN0006.jpg
 

orange395w

OG MEMBER
Staff member
02gt said:
You gonna have the car back together this weekend...? How about your tuning appointment?

The car will not be completely together this weekend. I'm not in a rush and I have no deadlines, so I'm checking everything over and over.

I ordered pushrods, but after checking the length just now I'm not so sure it's right, so I'm going to re-install the soft spring tomorrow and check again with the adjustable PR length checker to see what I come up with. Tell me what you think here is a pic. The idea is to have the thinnest witness mark possible and as close to center of the valve. I'm thinking the 8.3 may be a tad long from the looks of the line it is more toward the bottom of the valve stem. Closer to the intake side is better than closer to the exhaust side.

DSCN0014.jpg
 

orange395w

OG MEMBER
Staff member
Well I played with the car a bit today. I think I have the right length this time. Turns out that I was only off by .050". I could have run the ones that I have, but I want this thing to be dead on. Here is a pic of the new witness mark with a 8.25" PR.

DSCN0021.jpg


I also wanted to mount a rocker girdle to show how it looks installed, so here ya go.

DSCN0007.jpg


Last but not least I mounted my new CSR Billet Electric water pump.

DSCN0024.jpg


DSCN0022.jpg


DSCN0025.jpg
 

Gibs

Well-Known Member
Staff member
Global Moderator
Well that is just toooooo pretty.


Nice build and well documented. Thanks for answering my question. I just didnt understand what you were doing. I got you now. I didnt know about the cold differences or the alum and iron differences either. Good info.

Thanks.


Gib
 

orange395w

OG MEMBER
Staff member
Well finally got a chance to get into the garage tonight for a couple of hours. I installed my new March Electric water pump pulley system and verified the 8.25" pushrods look to be perfect.

Tomorrow I should be able to get the pushrod guide plates set up and dial in the valvetrain (rockers and girdles).

Here are the pics of today's work.

March pulley system.
DSCN0026.jpg


DSCN0027.jpg


Pushrod length confirmation
DSCN0029.jpg
 

Gibs

Well-Known Member
Staff member
Global Moderator
My god it just keeps getting better!!!!! Awesome job and keep the pics coming.....I am printing the thread out as a how to build a motor for dummies....LOL J/K but great work.


Cant wait to see it terrorize some tracks.


Gib
 

orange395w

OG MEMBER
Staff member
Well this should be changed to "Project Stand Still". Yes It's at a stand still again! Well it wasn't totally unexpected I had an idea that the intake wouldn't line up since the heads were milled.
The intake bolt holes are a little off due to the intake sitting higher on the heads. I will have to drop off the intake at Total Performance for milling Monday.

On a positive note I was able to get the valvetrain set up. All rockers have been adjusted and girdles installed. I also decided to mock everything up since it would help keep dirt out of the motor since my bag doesn't fit over the engine anymore. I'm going out later to buy my serpentine belt and fluids.

DSCN0035.jpg


DSCN0034.jpg


DSCN0036.jpg


DSCN0037.jpg


DSCN0038.jpg


DSCN0039.jpg


DSCN0041.jpg
 

Gibs

Well-Known Member
Staff member
Global Moderator
WOW Again I am impressed and I have been watching the entire thread.

You need to do this as a business on the side. Build engines for other people.


Gib
 

orange395w

OG MEMBER
Staff member
WOW Again I am impressed and I have been watching the entire thread.

You need to do this as a business on the side. Build engines for other people.


Gib

Thanks, but lets wait to see if it runs with no leaks first lol! I wish I could afford the new converter and transbrake before dropping the engine back in. As for doing it for a living I would love to, but I'm really just learning as I go. Anyone who can turn a wrench could do this.
 

Gibs

Well-Known Member
Staff member
Global Moderator
Stop being so humble!

Great work. Hell alot of people can turn a wrench but cant change their oil. Rebuild/building an engine requires some skill.

I know what you mean though about the money side of things....I would have a full floorpan replacement and a few other nice to have items for my project.

Gib
 

orange395w

OG MEMBER
Staff member
Well the lower intake is now torqued down. After all of the milling I still had to slot the bolt holes on the intake in order to get the bolts in. The ports line up pretty good for a block that was shaved .040" heads milled .020" and intake milled .040". Not to mention that the fuel injected intakes are designed for a 9.5" deck and mine was a 9.2".

DSCN0050-1.jpg


DSCN0046.jpg


DSCN0051-1.jpg


Anyway, I also installed the oil dipstick, new oil filter, put in some fresh 20w-50 and primed the oil pump. It's all down hill from here. Just waiting on my CSR water neck and then I'll drop the engine in. Stay tuned.................
 
Top