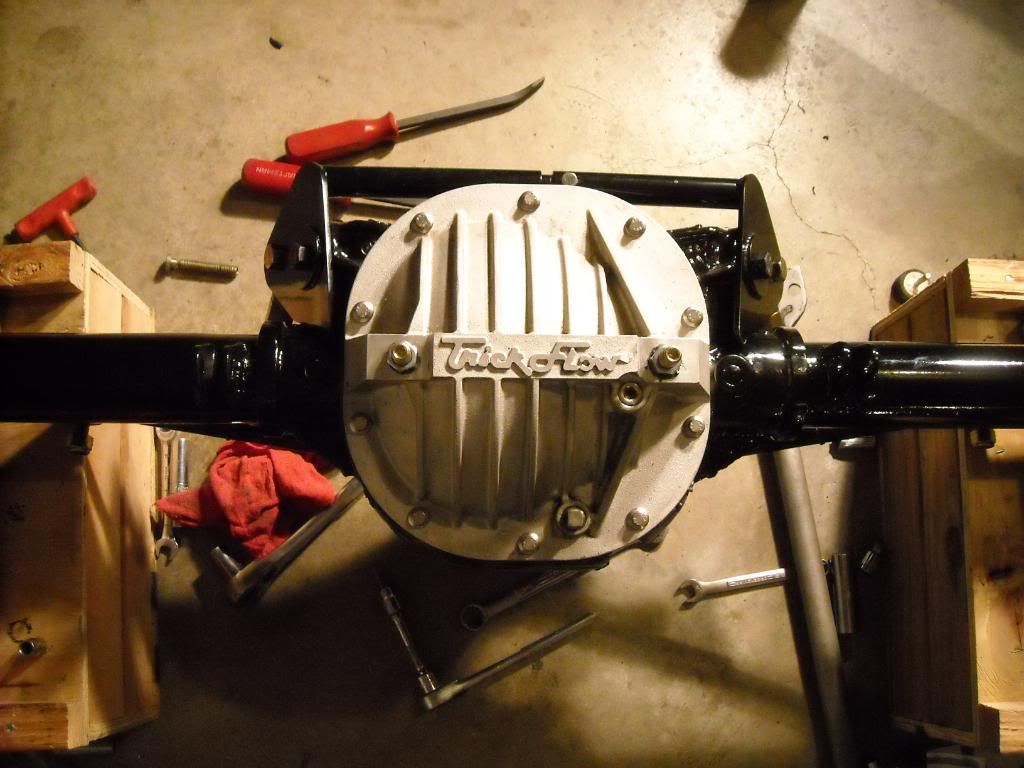
After installing the new bearings and pinion seal, last night I installed the pinion as well. I didn't have a sweeping inch lb tq wrench that is needed to check proper pinion preload, so I ran off to harbor freight. They didn't have one either, but they had a clicker style. I new it wasn't the one I needed, but I bought it anyway. Mainly because I was anxious to do the install.
Anyway, after using my tool that I fabricated in order to hold the pinion flange I began tightening down the pinion nut until all the freeplay was out. I then proceeded to check pre-load after every 1/8" turn of the nut. Once I felt a little drag I gave it one more very slight turn and checked it. I had 31inch lbs! New bearings should be between 16-29inch lbs. After getting a little worried I called Todd (our resident gear expert :hello") and told him I went over. He said it would be o.k. after all we are talking "inch lbs" here. I still didn't have a warm and fuzzy, so I barrowed a snap-on sweeping style tq wrench from work and busted through the door when I got home to check it with the proper tool and SWEETNESS!! It was actually sitting @ 27 inch lbs of pre-load. Now I had the warm fuzzy (Moral of the story? USE THE PROPER TOOLS!)
and told him I went over. He said it would be o.k. after all we are talking "inch lbs" here. I still didn't have a warm and fuzzy, so I barrowed a snap-on sweeping style tq wrench from work and busted through the door when I got home to check it with the proper tool and SWEETNESS!! It was actually sitting @ 27 inch lbs of pre-load. Now I had the warm fuzzy (Moral of the story? USE THE PROPER TOOLS!)
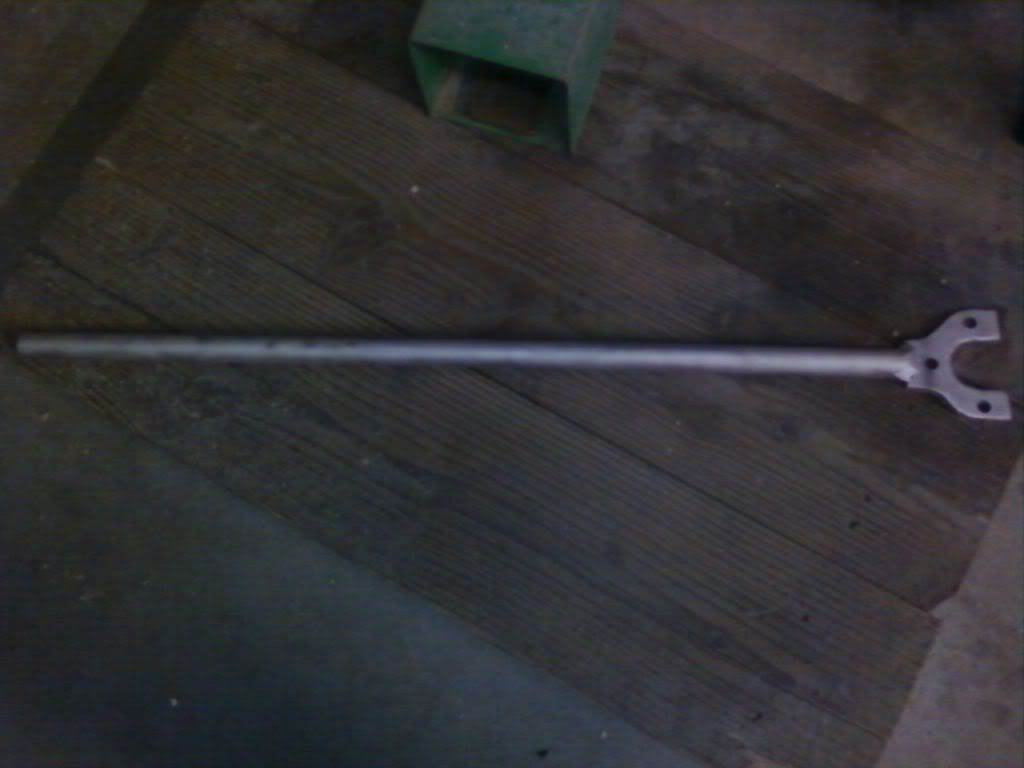
Pinion flange tool

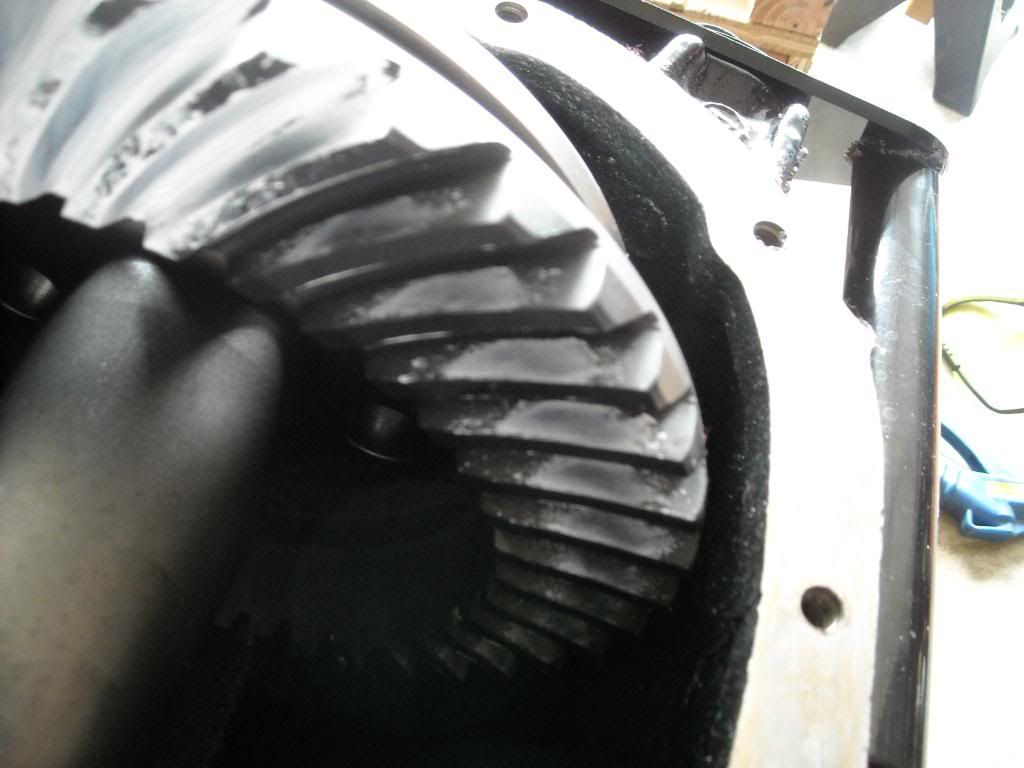
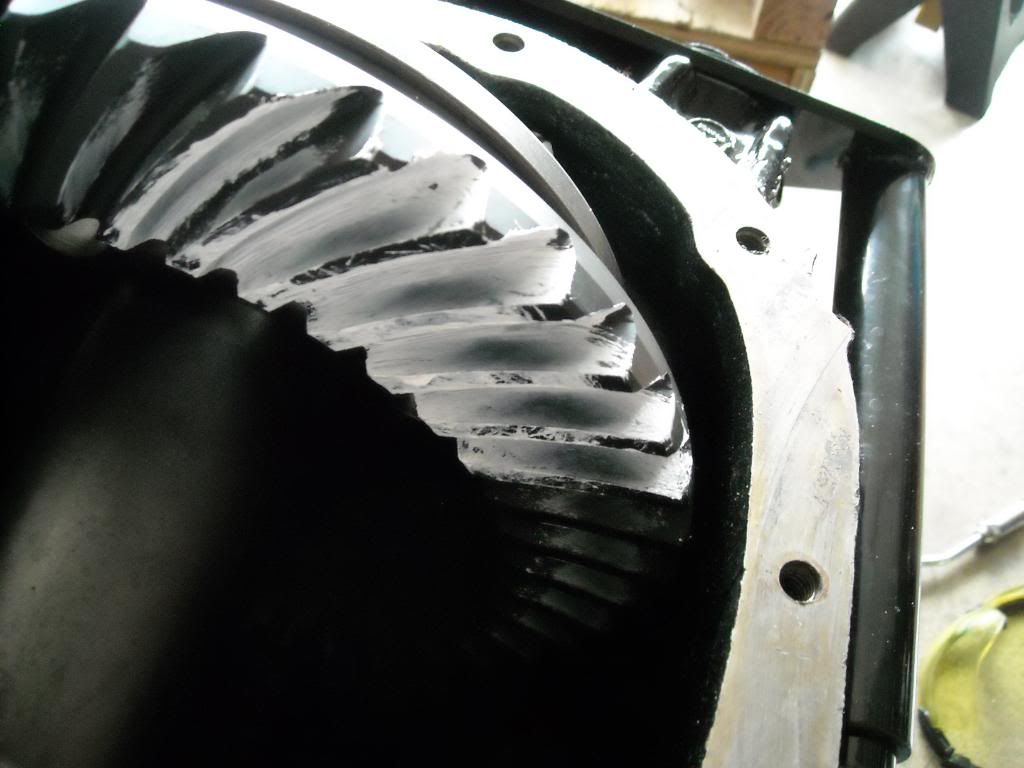
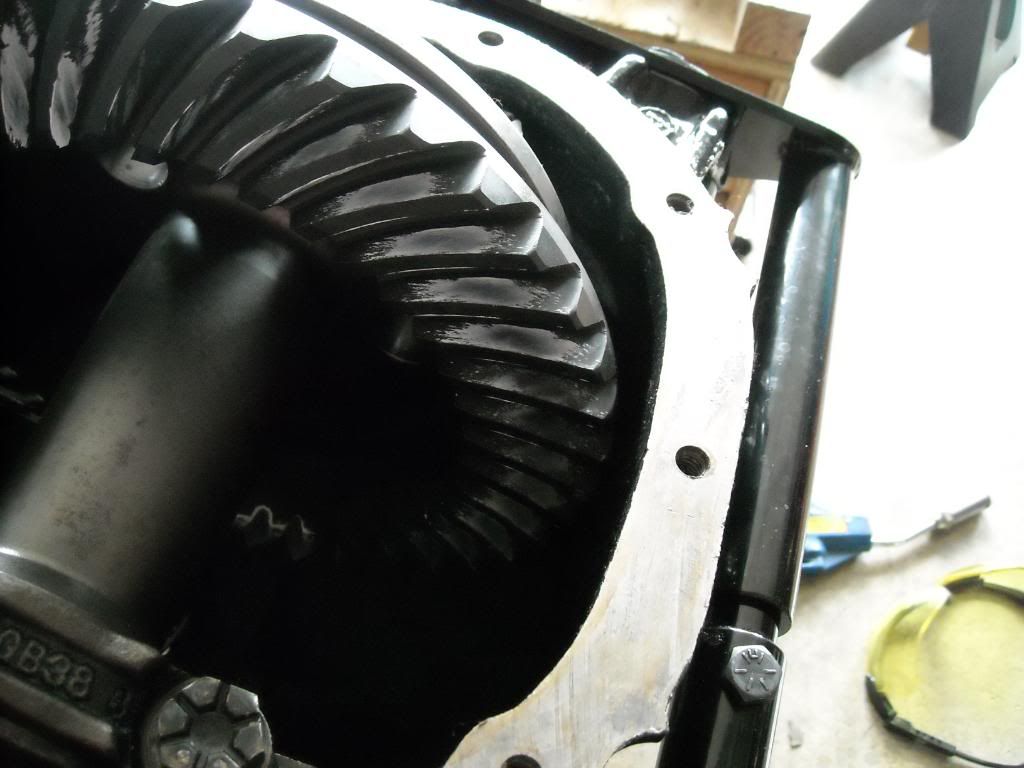
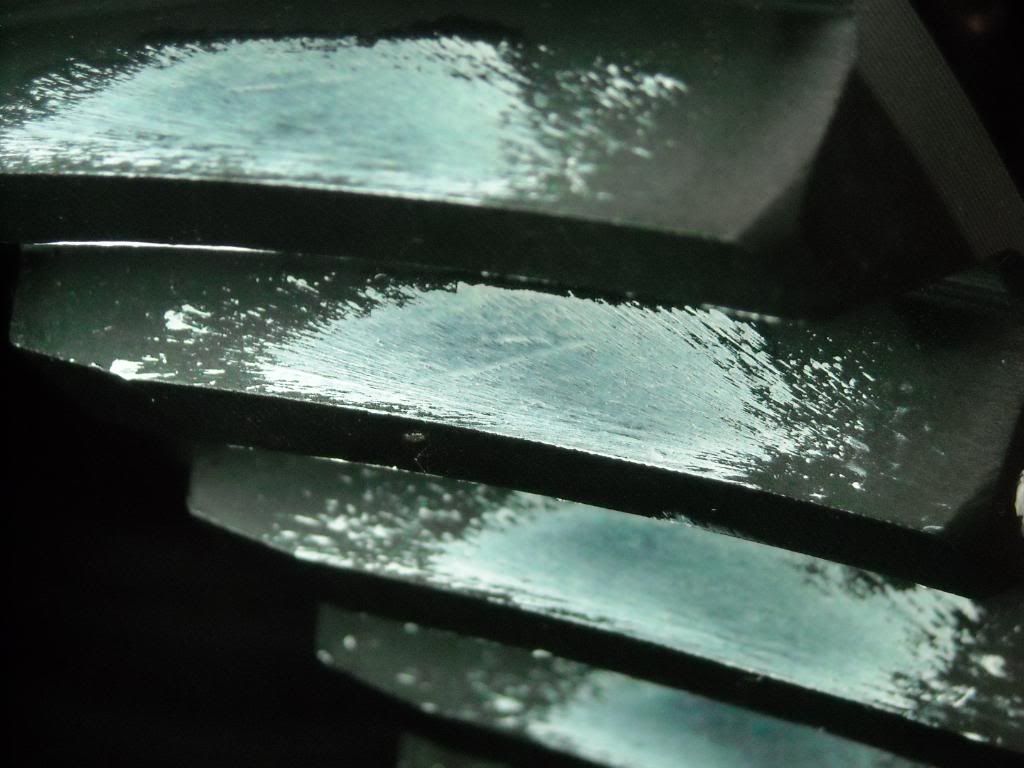
Next, I installed the spool. I had everything bagged and tagged so it was easy. Once I installed it and had no backlash I pulled two thin shims out of the left side and put them on the right. Backlash should be bewteen .08-.015 backlash. I got lucky and it ended up right at .010 backlash with only 1 adjustment. Now that the carrier was in place and backlash was good it was time to check gear pattern. Gear pattern came out pretty nice.
Next step will be to get the rearend cover on and get this puppy back in the car, so I can put the axles in. I can't wait to see how the new tires look. :rock:
Anyway, after using my tool that I fabricated in order to hold the pinion flange I began tightening down the pinion nut until all the freeplay was out. I then proceeded to check pre-load after every 1/8" turn of the nut. Once I felt a little drag I gave it one more very slight turn and checked it. I had 31inch lbs! New bearings should be between 16-29inch lbs. After getting a little worried I called Todd (our resident gear expert :hello
and told him I went over. He said it would be o.k. after all we are talking "inch lbs" here. I still didn't have a warm and fuzzy, so I barrowed a snap-on sweeping style tq wrench from work and busted through the door when I got home to check it with the proper tool and SWEETNESS!! It was actually sitting @ 27 inch lbs of pre-load. Now I had the warm fuzzy (Moral of the story? USE THE PROPER TOOLS!)Pinion flange tool
Next, I installed the spool. I had everything bagged and tagged so it was easy. Once I installed it and had no backlash I pulled two thin shims out of the left side and put them on the right. Backlash should be bewteen .08-.015 backlash. I got lucky and it ended up right at .010 backlash with only 1 adjustment. Now that the carrier was in place and backlash was good it was time to check gear pattern. Gear pattern came out pretty nice.
Next step will be to get the rearend cover on and get this puppy back in the car, so I can put the axles in. I can't wait to see how the new tires look. :rock: